Configuration walkthrough
This page explains the two setup screens in plain language and gives practical defaults.
Screen 1: Room and sensors
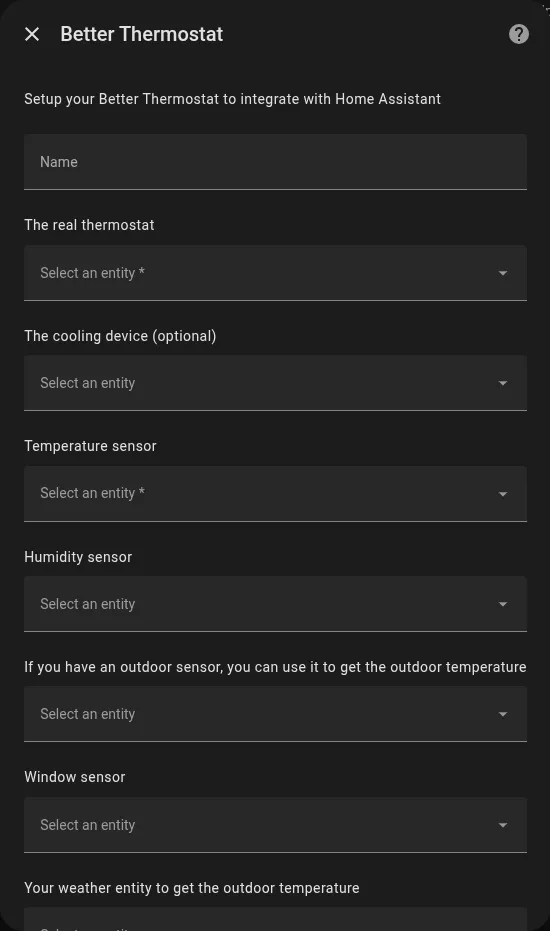
- Name: A friendly name for this room’s thermostat (e.g., “Living Room Heating”).
- The real thermostat: Select the smart radiator valves or thermostats in this room.
- The cooling device (optional): If you have an AC or cooler, select it here to control it alongside your heating.
- Temperature sensor: Your separate room temperature sensor. This is crucial for accurate heating!
- Humidity sensor: Currently just displays the humidity on your dashboard.
- If you have an outdoor sensor, you can use it to get the outdoor temperature: Select your outdoor sensor to let the system know when it’s warm outside.
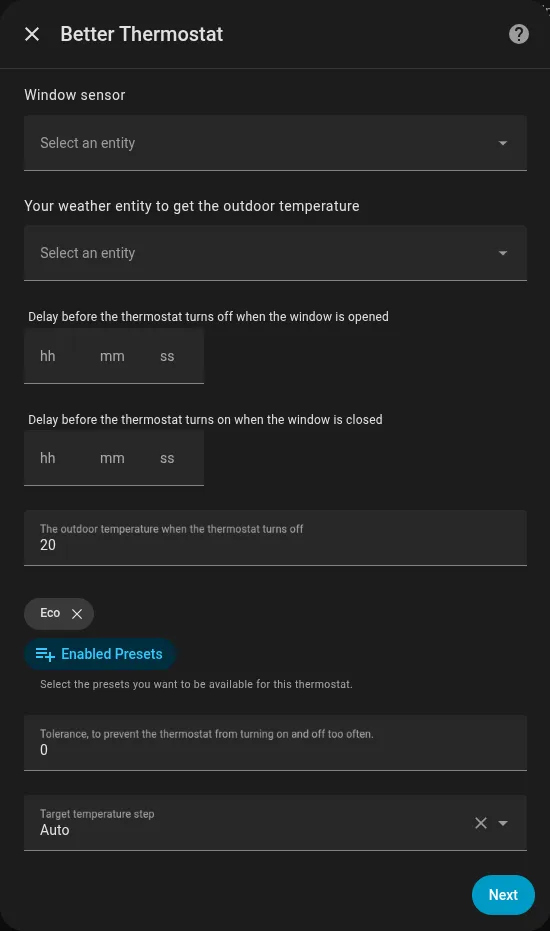
- Window sensor: Select your window sensor so the heating pauses automatically when you open a window.
- Your weather entity to get the outdoor temperature: An alternative to a physical outdoor sensor (like a weather forecast integration).
- Delay before the thermostat turns off when the window is opened: How long to wait after opening a window before pausing the heat (prevents pausing if you just open it for a quick second).
- Delay before the thermostat turns on when the window is closed: How long to wait after closing the window before resuming heat.
- The outdoor temperature when the thermostat turns off: If it gets warmer than this outside, the heating turns off automatically to save energy and money.
- Enabled Presets: Choose which modes you want to use (like Eco mode for saving energy while away).
- Tolerance, to prevent the thermostat from turning on and off too often: A small temperature buffer so your heater doesn’t constantly click on and off if the temperature fluctuates slightly.
- Target temperature step: How much the temperature changes when you press the plus or minus buttons (e.g., 0.5°C).
Window sensor group example
group: livingroom_windows: name: Livingroom Windows icon: mdi:window-open-variant all: false entities: - binary_sensor.openclose_1 - binary_sensor.openclose_2 - binary_sensor.openclose_3Screen 2: Calibration and behavior

Calibration type
How should Better Thermostat control your radiator?
- Target Temperature Based: The safest choice. It tricks your radiator into heating more or less by changing its target temperature. Works with almost all devices.
- Offset Based: Uses your device’s built-in calibration feature, if it has one.
Some devices expose offset as a number, others as a select. Better Thermostat supports both.
Calibration mode
This is the “brain” of Better Thermostat. How should it calculate the heating?
- Normal: Basic mode. It just syncs the temperature from your room sensor to the radiator.
- Aggressive: Heats up faster by temporarily setting the radiator much higher, but might overshoot your target temperature.
- AI Time Based: Recommended for most users. A smart algorithm that learns and adjusts to keep the temperature stable.
- MPC Predictive: Advanced smart control that predicts how your room heats up to prevent overshooting and save energy.
- PID Controller: A mathematical approach that constantly adjusts the valve. Best for advanced users.
- TPI Controller: Turns the heater on and off in calculated intervals to maintain a steady temperature.
Use Algorithm selection for decision help.
Other important toggles
- Overheating protection?: Turn this on if your room keeps getting too hot even after reaching the target temperature (often happens if radiators stay hot for a long time).
- If your TRV can’t handle the off mode, you can enable this to use target temperature 5°C instead: Some devices don’t have a proper “Off” switch. This sets them to 5°C instead to keep them off safely.
- If the auto means heat for your TRV and you want to swap it: Fixes a quirk with some specific thermostat brands where the modes are mixed up in Home Assistant.
- If your thermostat has no own maintenance mode, you can use this one: Adds a maintenance mode (like opening the valve fully to prevent it from getting stuck in summer) if your device lacks one.
- Ignore all inputs on the TRV like a child lock: Acts like a child lock. Changes made directly on the physical radiator valve will be ignored.
- If you use HomematicIP, you should enable this to slow down the requests to prevent the duty cycle: Turn this on if you use HomeMatic devices to prevent them from being overwhelmed with too many commands (duty cycle limit).